Colligo Tech
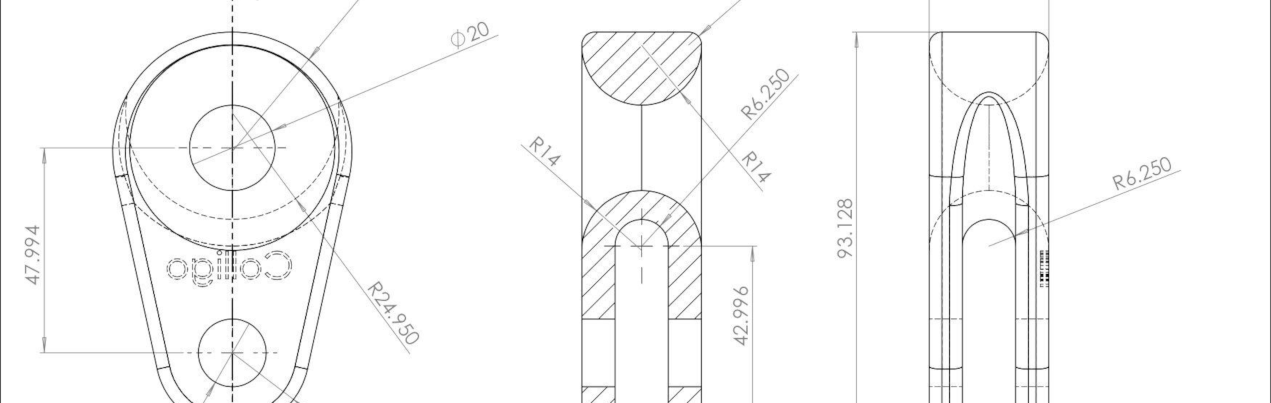
The Splice: Modified Brummel Splicing Instructions

1
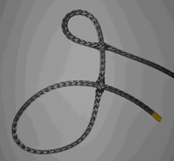
This is how the splice is setup. Think of it as 2 loops and you will not get lost. The standing part is on the right and leads down off the bottom of the photo. The tail is the taped end. Make 2 loops as shown.
2
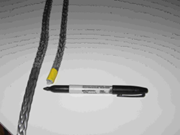
Now take the Terminator(thimble) and make a tight test fit around it with the line. Leave enough tail to equal about 72 times the diameter, 500mm or 20 inches for 7mm line and 648mm or 25 inches for 9mm line, after the terminator is wrapped. Mark with a pen where the lines come back together. This will be your first hole.

3
Remove the terminator, open the braid at the mark you just made with a fid being careful to align this hole correctly as the line lays so no twisting will result. This is one of the little things that will make splicing easier. Also, make sure you have 6 strands on each side of the fid.

4
Now remove the fid and send the line thru in the direction in the picture. The direction is im-portant. Maintain the double loops.

5
Now reinsert the terminator and pull the tail and snug it all up real nice. Now mark the tail just as it exits the hole on the tail side.
6
Take the terminator out and insert the fid at the mark you just made on the line. Again 6 strands on each side of the fid. Then insert the line thru the hole as shown. Direction is important.

7
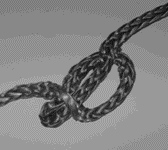
Now keep pulling the tail thru the hole and turn the hole inside out. You might need to snap the line hard and work it with your thumbs while pulling on it. Turn it completely inside out as shown.

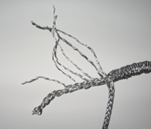
8
This shot shows the hole completely
pulled inside out.

9
Now enlarge the inverted hole you just made. A good trick here is to use 2 fids and pry it open as
much as possible.

10
Now take the eye you earlier made for the terminator and place it thru the enlarged, inverted hole. Form a point with the eye by squeezing it together and push it thru.
11
This shot shows the loop on its way thru the enlarged hole in the right direction. When it pops
thru the other side keep pulling as it will then re invert the hole and turn it rightside out.

12
Here is the splice with the hole turned right side out. A good practice here is to insert the terminator into the loop to loosen it up. Then remove it.
13
Now here is the most important
part of the splice, the Bury.
Now hold the tail parallel with
the line and place a mark on the
line 3 inches from the tail end.
This is the exit location for the
bury.

14
Take your fid and insert it into the line 2 strands
down from where it comes thru the last hole.
Continue to push it thru the center of the
line opening up the braid. When you come
to the exit mark , exit the line as shown.
Spend some time bending the line at the
entrance and exit to make it easier to insert
and pop out the line when you insert it.

15
Next, remove the fid and push the line
thru the braid and out thru the exit hole.
If you compress the line between the entrance
hole and the exit hole it will be
easy to do this.
16
Now, pull the tail completely thru
compressing the over braid to get the
maximum tail exposure. Measure the
length of exposed tail, divide by 12
and pull out a strand from the tail by
that distance until you get to the end
The taper is very important, without it the splice strength will only be about 50% of breaking strength.

17
Now, Cut each strand at the tail. Then
slide the over braid (cover) back over
the tail to complete your splice. This
will not need to be whipped. The
Brummel Splice will not pull out. You
can expect about 2 inches of stretch for
7mm and 4 inches for 9 mm to reset the
line braid.